Step-by-Step Guide to Creating a Bulk Selfbook Campaign
Open your Selfbook Dashboard and click ‘+ New Selfbook’
Step 1 – Select your recipients
Here you can select recipients from the left-hand side of the screen and view/manage your selected recipients on the right-hand side of the screen.
To create a list of recipients for your Selfbook campaign, follow the below steps.
- Use the left-hand side of the screen to select patients. There are two ways to do this:
- Import
- Search patient list
-
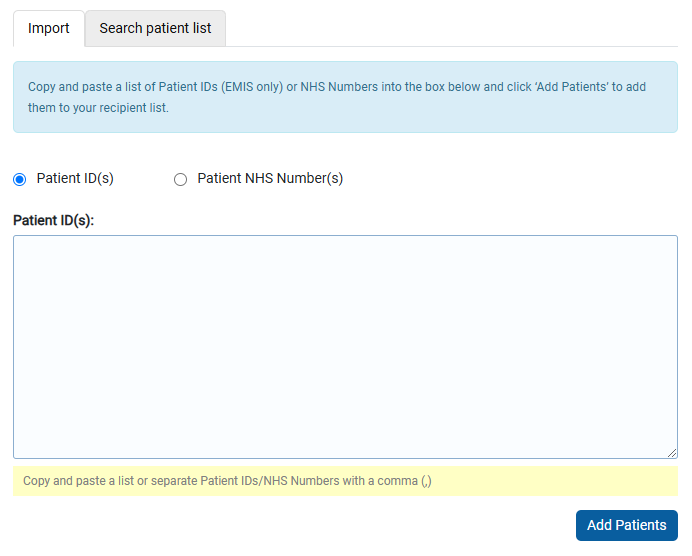
To import:
- Check the relevant box to let the system know what data you’re importing – Patient IDs (EMIS only) or NHS Numbers
- Ensure each patient ID/NHS number is on a new row or separated by a comma (,)
- Click the ‘Add Patients’ button. Your patients will be imported and displayed on the right-hand side of the screen
3. To select from patient list:
-
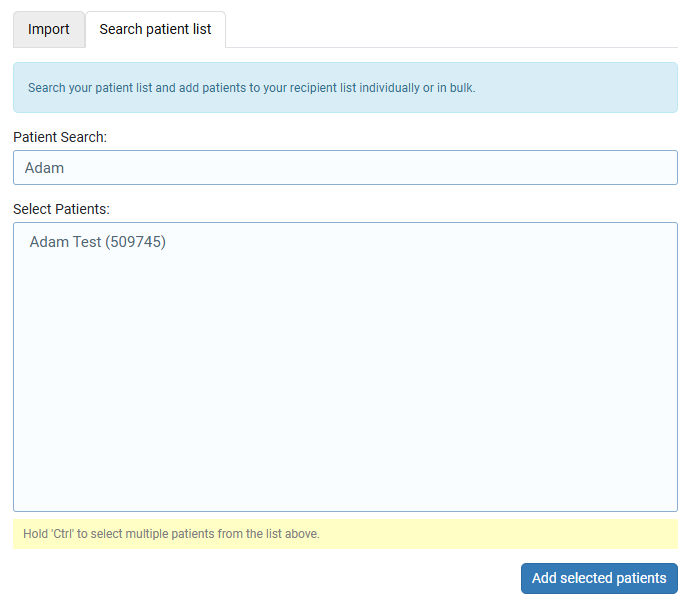
- Click the ‘Search patient list’ tab
- Start typing a patient’s first name, surname, patient ID (EMIS only), or NHS number (Systm1 only) in the ‘Patient Search’ box. A list of all possible matches will be displayed in the box below
- Click the patient your wish to add to the recipient list. Hold ‘Ctrl’ to select multiple patients
- Click the ‘Add Patients’ button. Your patients will be imported and displayed on the right-hand side of the screen
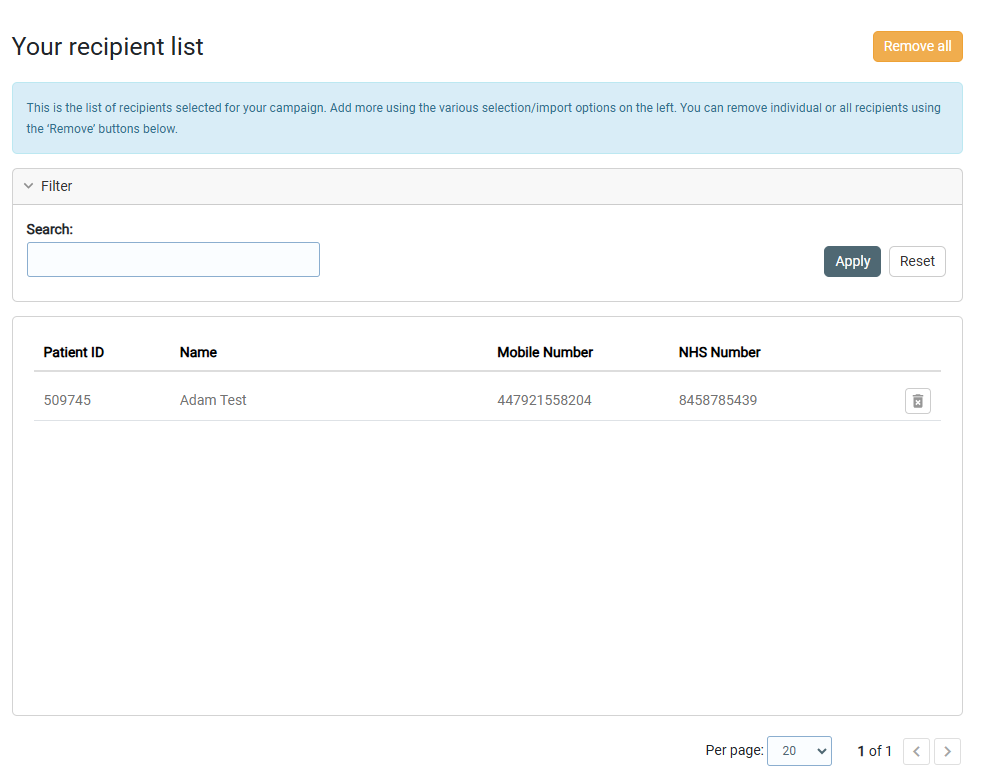
4. Use the right-hand side of the screen to view and manage the current list of recipients. Here you can:
-
- Remove all recipients from the campaign using the ‘Remove all’ button
- Remove individual recipients from the campaign using the delete button (trash can icon)
- Search for an individual recipient in your current recipient list using the search box
Step 2 – Compose your message content
Here you create your Selfbook message content and select from various content options:
-
Include a patient questionnaire in the Selfbook journey – this is useful if you wish to collect structured patient data before the patient attends their appointment.
For example – ask a patient to complete a Diabetes Review Questionnaire before booking a diabetes review appointment.Selecting a questionnaire automatically populates some message content. This can be overwritten manually or by selecting a message template (see option 2 below).
Important note: Including a patient questionnaire does not send another message or link to the patient. The patient will receive one single link in one single message. The only difference is the journey/flow they follow when clicking on the link (i.e. they would first be asked complete a questionnaire, and secondly asked to book an appointment, all in the same journey/flow).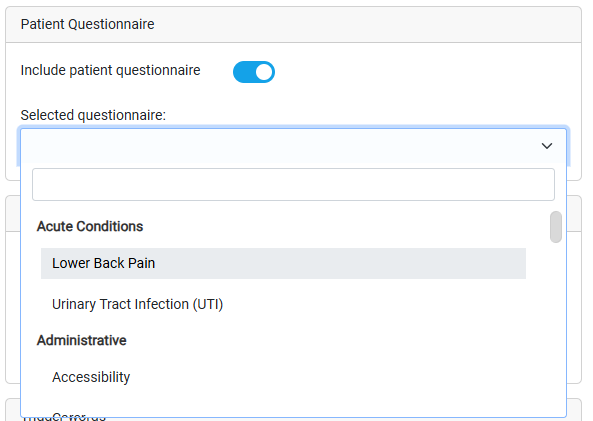
-
Select a message template – this time-saving feature is useful for quickly adding content that you have previously created. For more information on message templates click here.
To add a template to your Selfbook campaign first select the template subject/category and then select the relevant template from the drop-down list below.
Adding a template will replace any message content currently in the content box.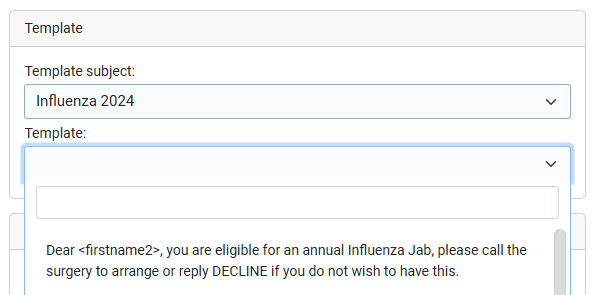
-
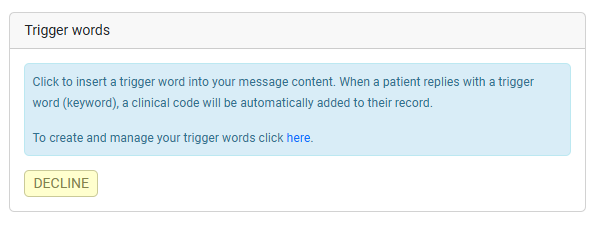
Add a trigger word – Trigger Words (also known as keywords) allow patients to reply to your message with a single word. When a patient replies with a trigger word, a clinical code will be automatically added to their record. Trigger words are fully compatible with the NHS App.Available trigger words will be displayed in this section. Click the trigger word to insert it into the message content.
If you don’t see anything in this section you may need to create a trigger word
For more information on trigger words click here.
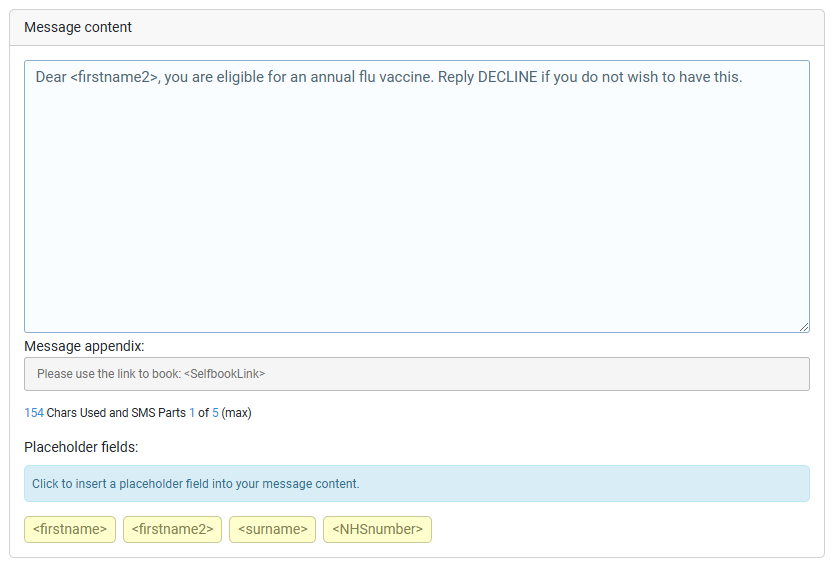
- Compose your message content – Your content can be typed manually or composed by using a template (see option 2 above). Quickly insert a placeholder field by clicking on the relevant yellow button. Placeholder fields work like merge tags and automatically insert the appropriate patient data (e.g. first name or surname). Learn more about placeholder fields here.Any Selfbook or Patient Questionnaire links are automatically added to the end of the message. You can see these in the Message appendix section (text in the message appendix cannot be edited).Tips for saving SMS credits:
Step 3 – Trigger words
This step checks your trigger words to ensure you’re happy with their expiry date and the clinical codes they are using. Clicking ‘Show detail’ will take you to the ‘Manage Trigger Words’ page where you can view and amend details if necessary.

Step 4 – Slot type
Step 4 is where you select the slot type that you want your patients to book into. Use the drop down or search box to search for the appropriate slot type. The numbers to the right of the slot type indicate how many slots are remaining in the slot type. You can select a slot type with zero slots but be sure to add slots before the invitation is sent to the patient.
The ‘Patient friendly appointment name’ is what the patient will be asked to book. It gives you an opportunity to rename the slot type so that the patient clearly understands what they are booking. For example, a slot type called “HCA” might be confusing for a patient. You could use the ‘Patient friendly appointment name’ to change this to “Annual diabetic blood test” (this is just an example).
Finally, you can inform the patient whether this is a face-to-face, video or telephone appointment using the ‘Appointment type’ drop-down box. This is optional.
Tip: If you don’t see the slot type you need, first check that it has been created in your clinical system. It can take up to 15 minutes for new slot type to appear in Selfbook. If you still cannot see it, trying adding a dummy appointment to the slot type.

Step 5 – Additional options
Step 5 is where you can specify additional options. The options you have available are:
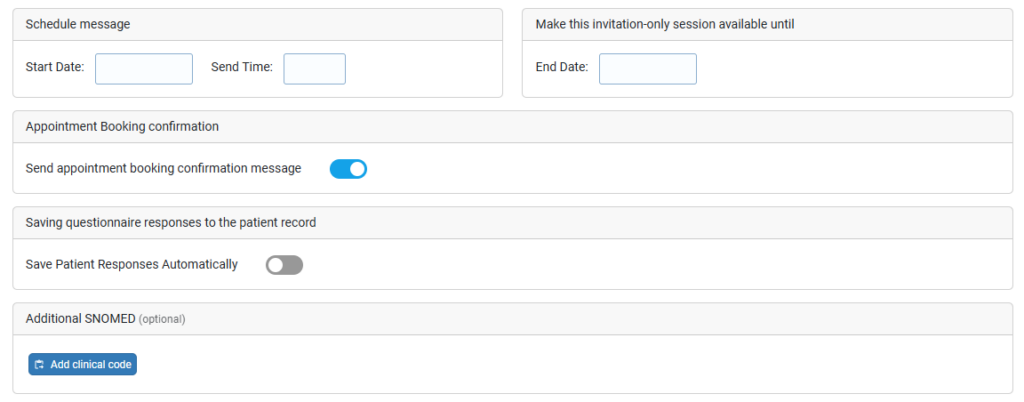
- Scheduling – here you can schedule your messages to be sent at a certain date and time in the future.
- End date – you must enter a date for the Selfbook link to close. Patients will be able to book their appointment until 11:59pm on the specified end date. If the Selfbook campaign is linked with a questionnaire, the maximum end date is 28 days from the start date.
- Appointment booking confirmation – you can choose to send patients a booking confirmation message containing their appointment details. This is enabled by default but can be disabled here.
- Save questionnaire responses automatically – if you have a questionnaire linked with your Selfbook campaign, you can choose whether questionnaire responses are saved to the patient record automatically or individually as they arrive in your inbox.
-
Additional clinical code – this is useful if you want to add an additional clinical code (SNOMED or V2) to the patient’s record at the point of sending the Selfbook invitation.
Step 6 – Summary

The last step is simply to check that everything looks correct and click to confirm that you’re happy to send/schedule your bulk Selfbook message.
Patients will receive their invitation by SMS or NHS App message, if they have their app notifications switched on. For more on NHS App messaging click here.

