When a patient responds to a Patient Questionnaire sent to them, their replies will be stored in myGP Connect within the Inbox.
In order to monitor the response, please do the following steps:
- Log into your myGP Connect system and go to the left-hand side menu bar and click on Messages.
- Then press on Questionnaire at the top of the screen.
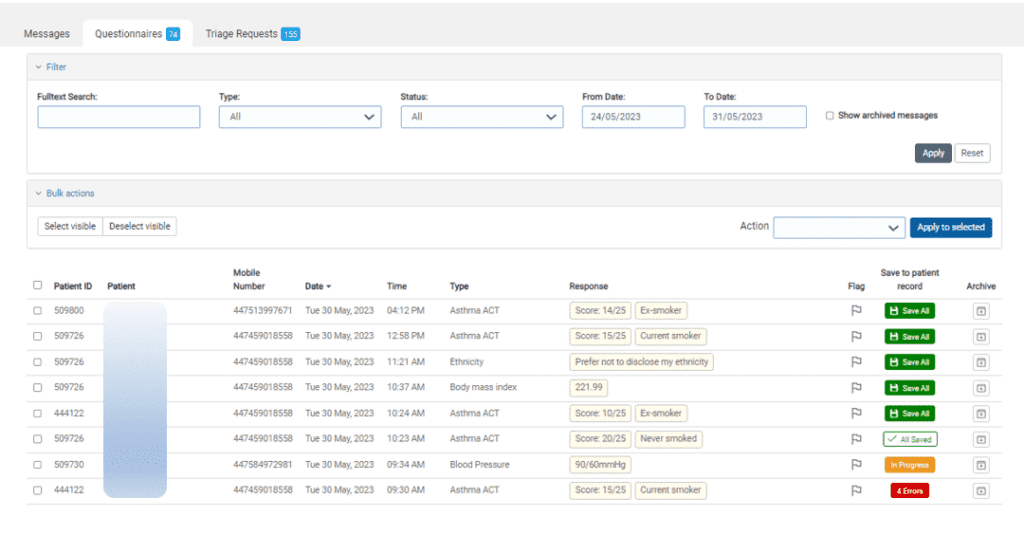
- The Questionnaire inbox will be displayed.
The response entries will be broken down into the following information columns:
- Patient ID: the clinical number linked to the patient
- Patient: patient’s first and last name
- Mobile Number: mobile number registered to the patient
- Date: date response was received
- Time: time response was received
- Type: the type of Questionnaire sent to the patient
- Response: the results input by the patients
- Flag: Mark the questionnaire for follow-up
- Save to patient record: option to Save response directly to patient record on clinical system
- Archive: gives the option to archive the patients’ responses, either before or after saving them to the clinical system
Free text responses
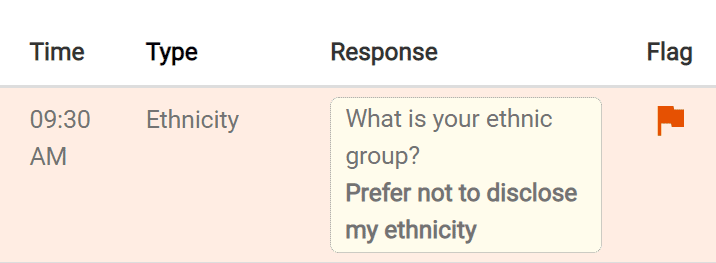
You will also be alerted to any Free Text responses by the patient in the questionnaire.
- Simply click on the record to see what the patient has written.
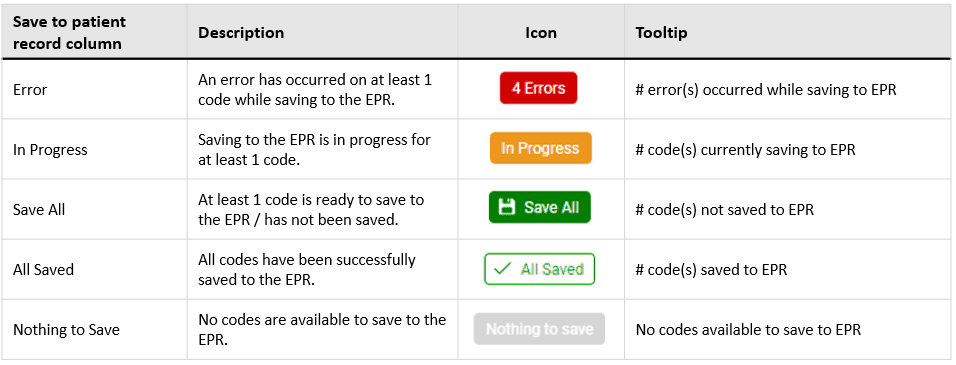
Saving to the Patient Record
Below shows what the different options you see in the inbox mean
Saving additional codes
You can now also add additional codes to send back to the patient record
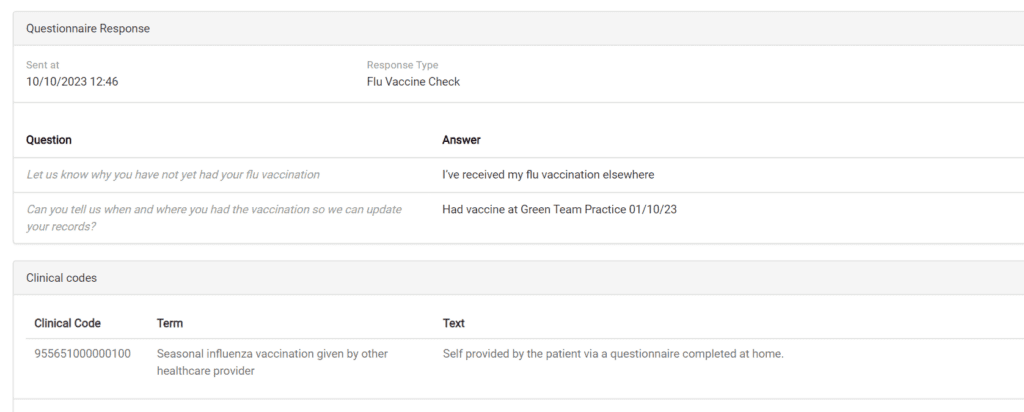
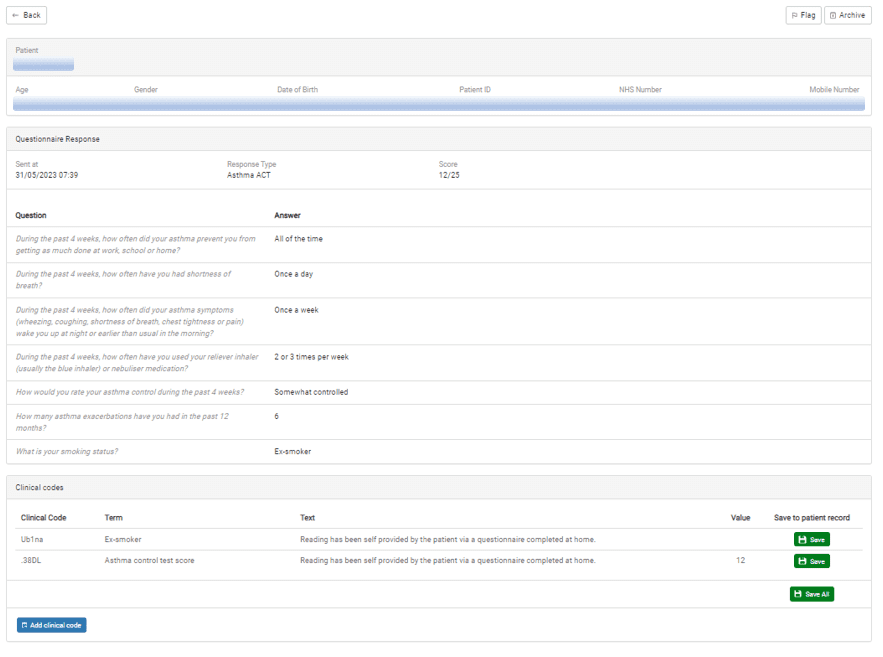
- Click on the patients’ response in the inbox, you will be taken to a summary screen of their answers (shown below)
- Click on Add clinical code
- Enter your chosen code
- Click Add
Important actions you can do
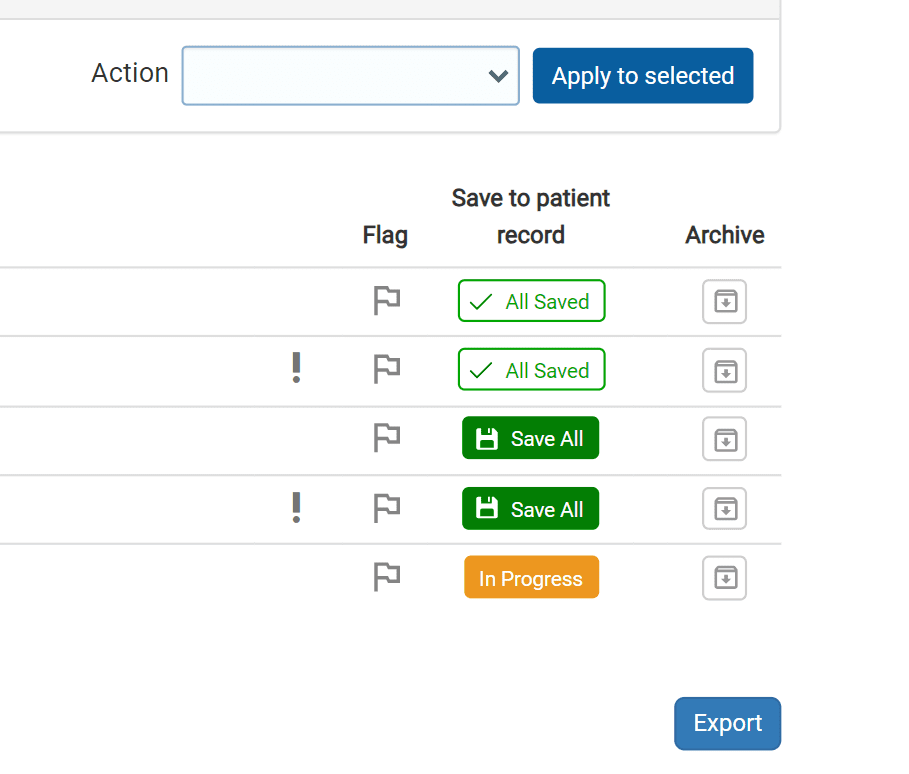
If you have chosen to save responses manually, you can now bulk-code them into the clinical system
To do this:
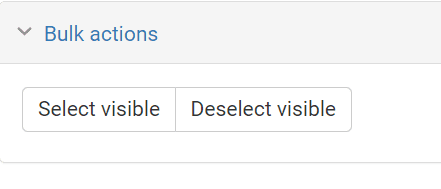
- Select each response you want to save, or to select all on the page, click Select Visible
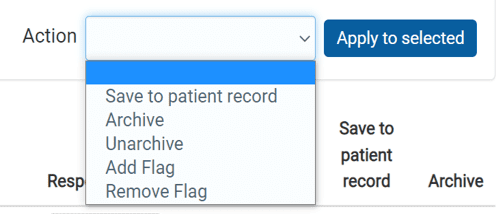
- On the right-hand side, select the drop-down box next to Action, and chose what you want to do
- Press Apply
Flagging a patient response
One option you have is to mark out a patient questionnaire for follow up
Simply click on the Flag symbol next to the entry. Click it again to unflag it.
This can also be done in Bulk actions as shown above
Archiving a patient response
You can also Archive a patient’s responses too.
- Simply click on the Archive button on the right-hand side of the patient’s response
To be able to view archived responses:
- Select Show archived messages
- Select your date range
- Click Apply
- You will now be able to see the archived response
- You can also unarchive the response if needed, follow the above steps and select Unarchive from Bulk Actions

