

To download Report, simply click on specific month and it will download automatically as a PDF on your desktop.
March 7, 2022
The Patient Import functionality allows users to seamlessly add multiple patient records to the system using a CSV file.
Steps:
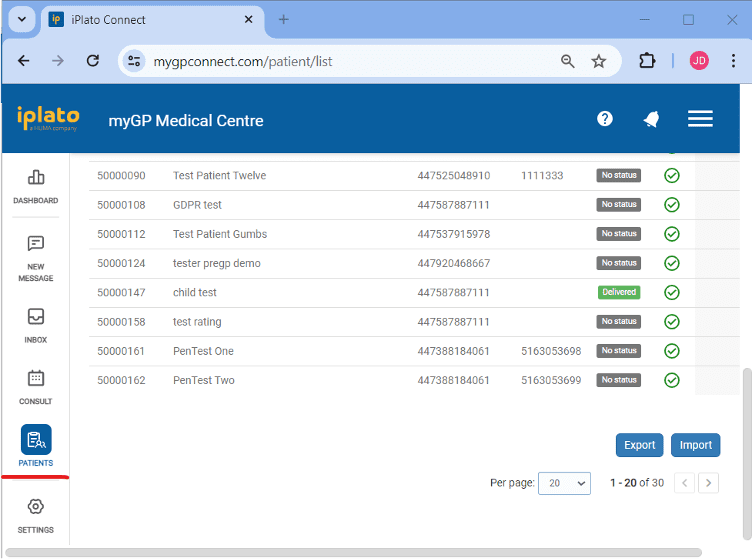
- Navigate to Patient List:
– Go to the Patient List page.
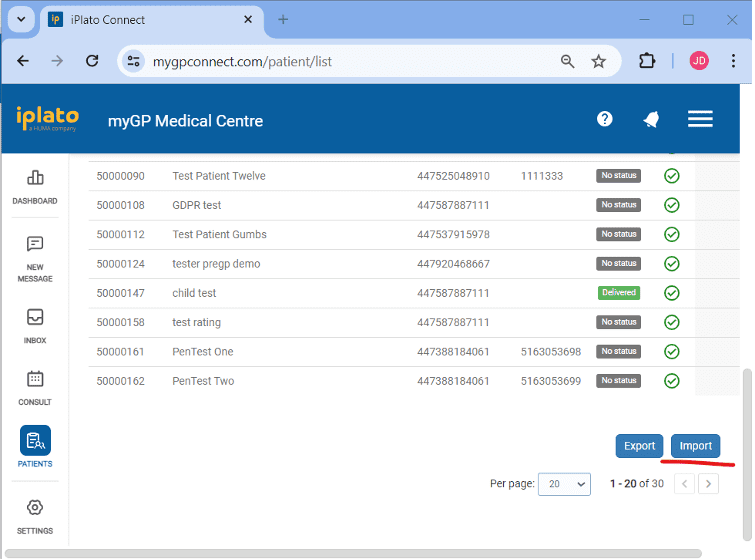
- Initiate Import Process:
– Click on the “Import” button.
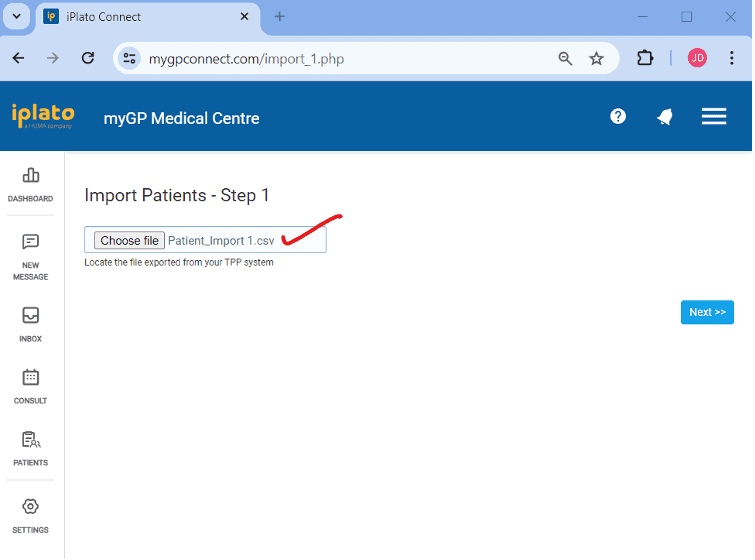
- Upload Patient Data:
– Upload the patient data CSV file and click the “Next” button.
– You can export this file from the TPP system or use the provided reference file and update the patient data accordingly.
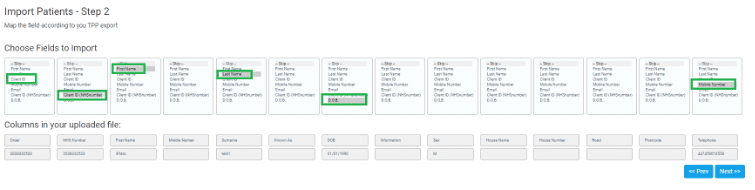
- Map Fields:
– Map the fields according to the data in your CSV file and click “Next.”
- Check for Errors:
– Review any errors that appear in the next steps and click “Next.”
– The allowed formats for Date of Birth are (01/01/1990) and for Mobile Number (447XXXXXXXX), so please ignore errors related to these formats and continue.

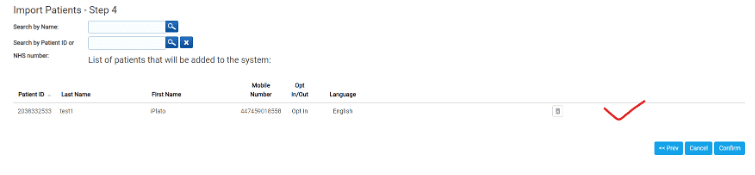
- Review Patient List:
– Verify the list of patients that will be added to the system before clicking the “Confirm” button
- Confirm and Verify:
– Once confirmed, return to the Patient List to ensure the patients have been successfully added

Note: Please use this reference CSV file and change the patient data as per your records. Make sure the data is in text format in the CSV file. Also, go through the recorded video for more information.
iPlato-Instructions_Import-Patient.csv
Please contact help@iplato.com if you encounter any problems.


© 2026 iPLATO. All rights reserved
Practice Area
To download Report, simply click on specific month and it will download automatically as a PDF on your desktop.
March 7, 2022
The Patient Import functionality allows users to seamlessly add multiple patient records to the system using a CSV file.
Steps:
- Navigate to Patient List:
– Go to the Patient List page.
- Initiate Import Process:
– Click on the “Import” button.
- Upload Patient Data:
– Upload the patient data CSV file and click the “Next” button.
– You can export this file from the TPP system or use the provided reference file and update the patient data accordingly.
- Map Fields:
– Map the fields according to the data in your CSV file and click “Next.”
- Check for Errors:
– Review any errors that appear in the next steps and click “Next.”
– The allowed formats for Date of Birth are (01/01/1990) and for Mobile Number (447XXXXXXXX), so please ignore errors related to these formats and continue.
- Review Patient List:
– Verify the list of patients that will be added to the system before clicking the “Confirm” button
- Confirm and Verify:
– Once confirmed, return to the Patient List to ensure the patients have been successfully added
Note: Please use this reference CSV file and change the patient data as per your records. Make sure the data is in text format in the CSV file. Also, go through the recorded video for more information.
iPlato-Instructions_Import-Patient.csv
Please contact help@iplato.com if you encounter any problems.
© 2026 iPLATO. All rights reserved
/
Settings Overview/
To download Report, simply click on specific month and it will download automatically as a PDF on your desktop.
To download Report, simply click on specific month and it will download automatically as a PDF on your desktop.
March 7, 2022
The Home screen in myGP Connect is your default location after logging into the system. It holds several helpful statistics and info breakdowns of how your system is currently running.
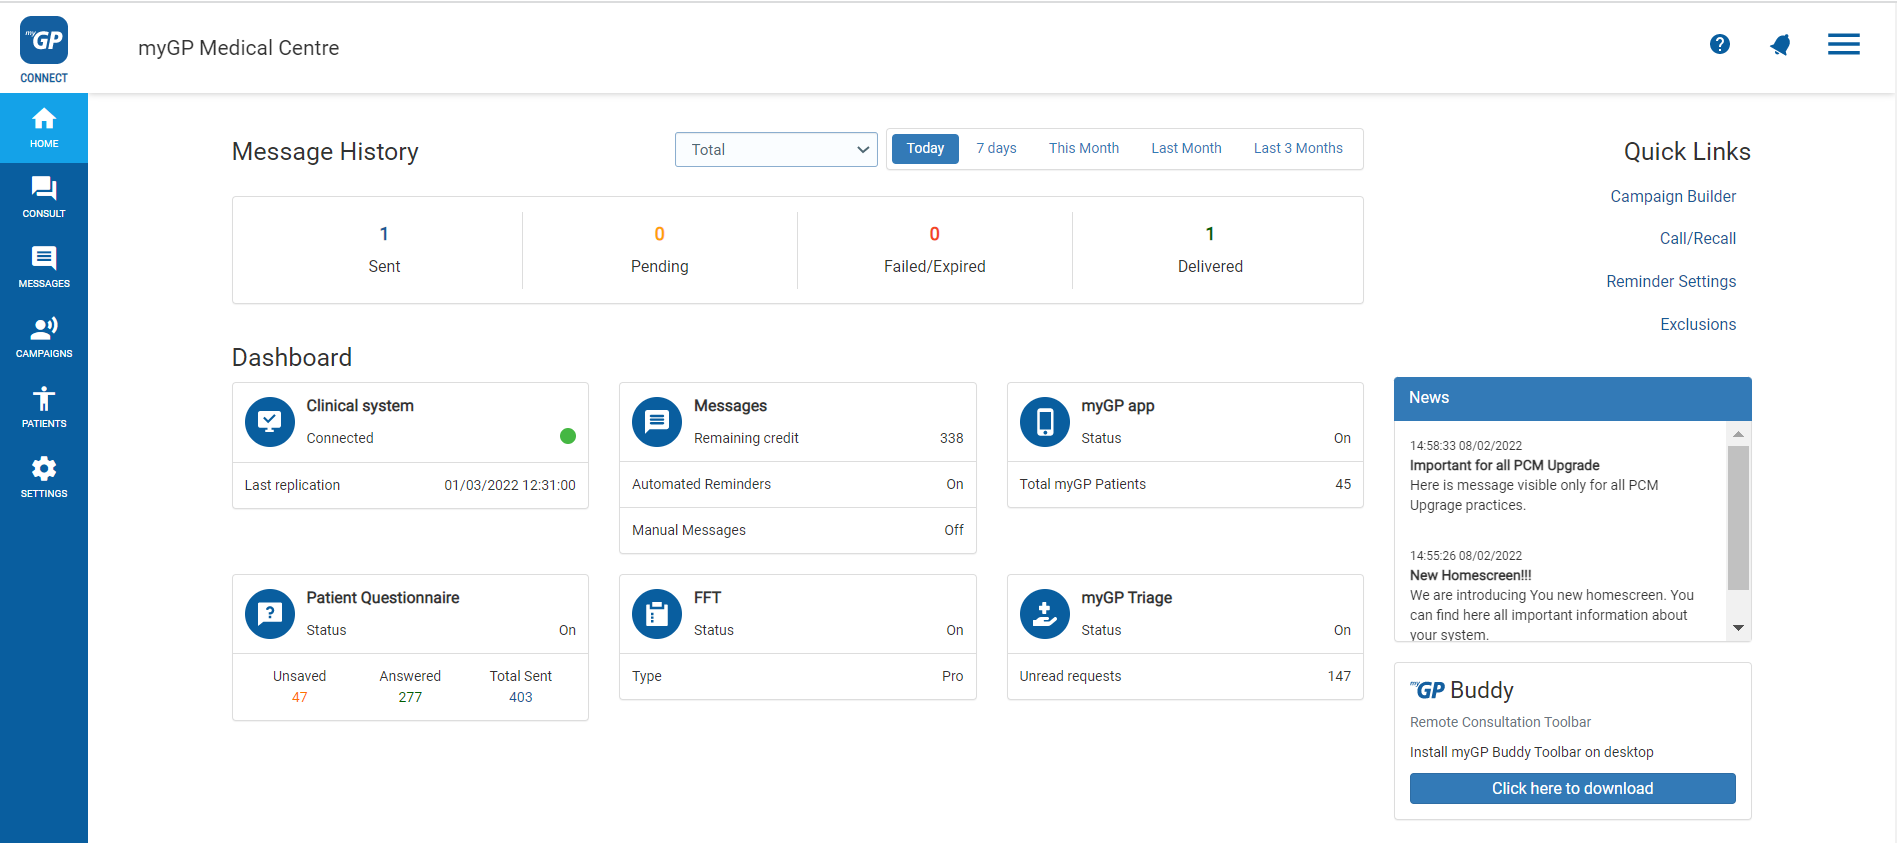
Here is a breakdown of what each element means:
Message History
This section will give you the opportunity to see the status of outgoing Connect messages via filters from current Today to 3 Months prior.
- Sent: any messages sent via myGP Connect
- Pending: any messages that are in process of being sent
- Failed/Expired: any messages that been cancelled due to the receivers contact number not being valid, or for phone being switched off for over 72 hours
- Delivered: any messages that have been successfully delivered
Dashboard
This section displays helpful information spanning across Connects feature sets.
- Clinical System: this covers the Last replication date, this is the last date that your clinical system and myGP Connect synched
- Messages: this covers Remaining credits to send messages and if Automated Reminders or Manual Messages are switched on or off
- myGP App: if app is enabled and how many patients are users
- Patient Questionnaire: if PQ feature is enabled, and showcases the traffic statistics
- FFT: if enabled and if the PRO version is active
- myGP Triage: if feature is enabled, and how many requests are unread
- News column: column box that gives users the latest news and updates about Connect and other iPlato features
© 2026 iPLATO. All rights reserved