

How do I enable the Automatic Cancellation Message?
January 7, 2021
The Patient Import functionality allows users to seamlessly add multiple patient records to the system using a CSV file.
Steps:
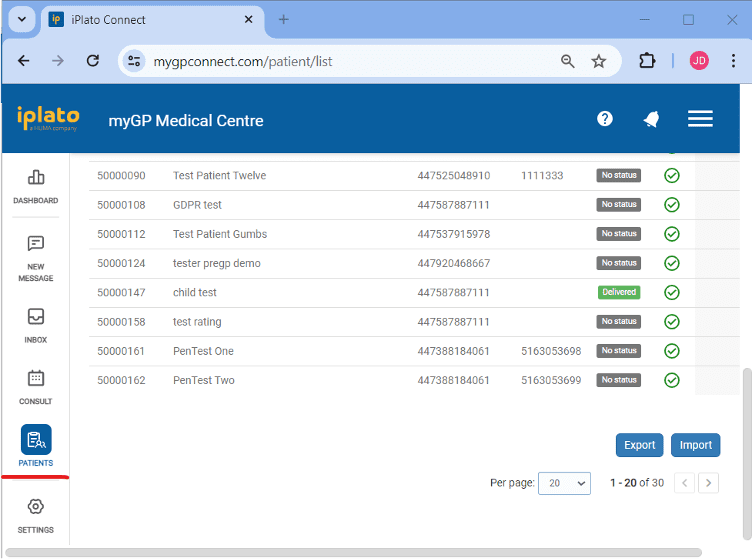
- Navigate to Patient List:
– Go to the Patient List page.
- Initiate Import Process:
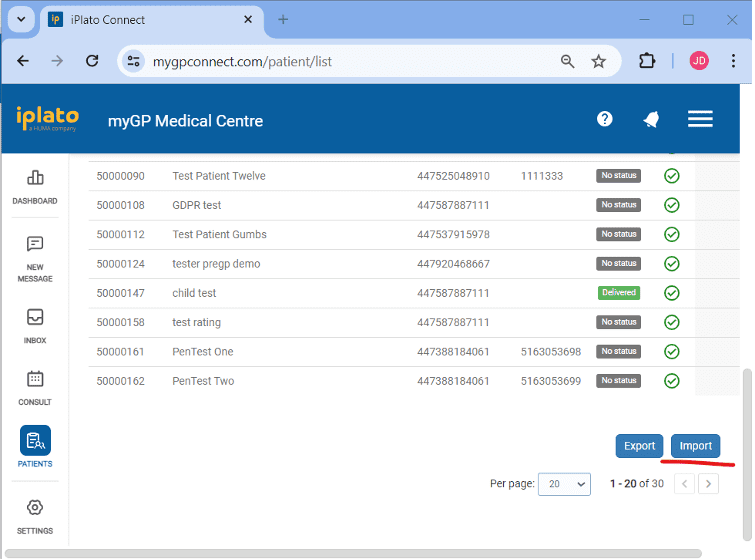
– Click on the “Import” button.
- Upload Patient Data:
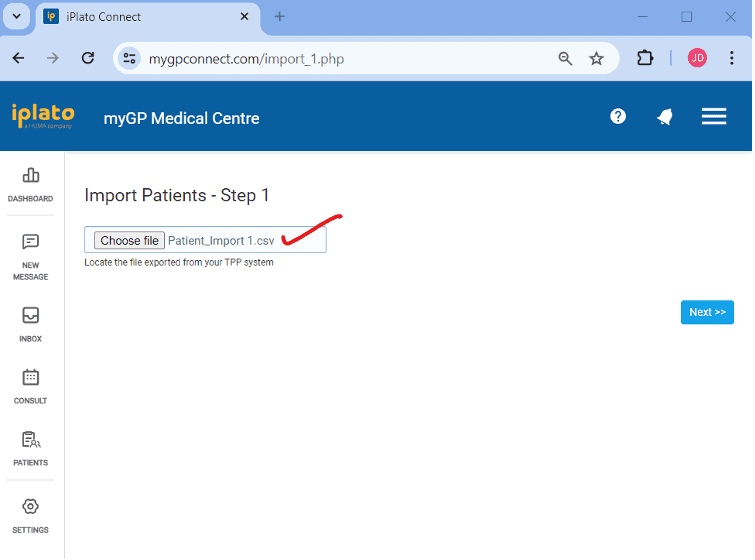
– Upload the patient data CSV file and click the “Next” button.
– You can export this file from the TPP system or use the provided reference file and update the patient data accordingly.
- Map Fields:
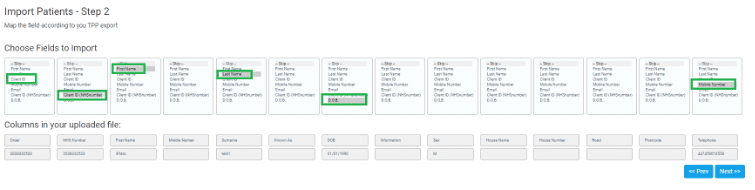
– Map the fields according to the data in your CSV file and click “Next.”
- Check for Errors:
– Review any errors that appear in the next steps and click “Next.”
– The allowed formats for Date of Birth are (01/01/1990) and for Mobile Number (447XXXXXXXX), so please ignore errors related to these formats and continue.

- Review Patient List:
– Verify the list of patients that will be added to the system before clicking the “Confirm” button
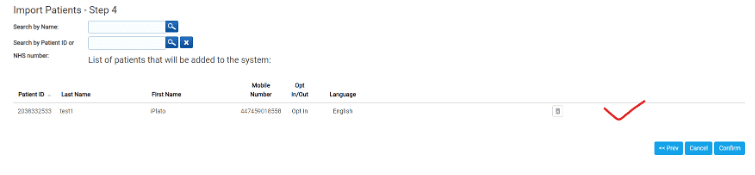
- Confirm and Verify:
– Once confirmed, return to the Patient List to ensure the patients have been successfully added

Note: Please use this reference CSV file and change the patient data as per your records. Make sure the data is in text format in the CSV file. Also, go through the recorded video for more information.
iPlato-Instructions_Import-Patient.csv
Please contact help@iplato.com if you encounter any problems.


© 2026 iPLATO. All rights reserved
Practice Area
How do I enable the Automatic Cancellation Message?
January 7, 2021
The Patient Import functionality allows users to seamlessly add multiple patient records to the system using a CSV file.
Steps:
- Navigate to Patient List:
– Go to the Patient List page.
- Initiate Import Process:
– Click on the “Import” button.
- Upload Patient Data:
– Upload the patient data CSV file and click the “Next” button.
– You can export this file from the TPP system or use the provided reference file and update the patient data accordingly.
- Map Fields:
– Map the fields according to the data in your CSV file and click “Next.”
- Check for Errors:
– Review any errors that appear in the next steps and click “Next.”
– The allowed formats for Date of Birth are (01/01/1990) and for Mobile Number (447XXXXXXXX), so please ignore errors related to these formats and continue.
- Review Patient List:
– Verify the list of patients that will be added to the system before clicking the “Confirm” button
- Confirm and Verify:
– Once confirmed, return to the Patient List to ensure the patients have been successfully added
Note: Please use this reference CSV file and change the patient data as per your records. Make sure the data is in text format in the CSV file. Also, go through the recorded video for more information.
iPlato-Instructions_Import-Patient.csv
Please contact help@iplato.com if you encounter any problems.
© 2026 iPLATO. All rights reserved
How do I enable the Automatic Cancellation Message?
January 7, 2021
If you need to enable your Automatic Cancelation Message, please do the following steps:
- Log in to your myGP Connect system
- Click on Settings found on the left-hand side menu
- Click on Cancellation and go to the General sub-tab
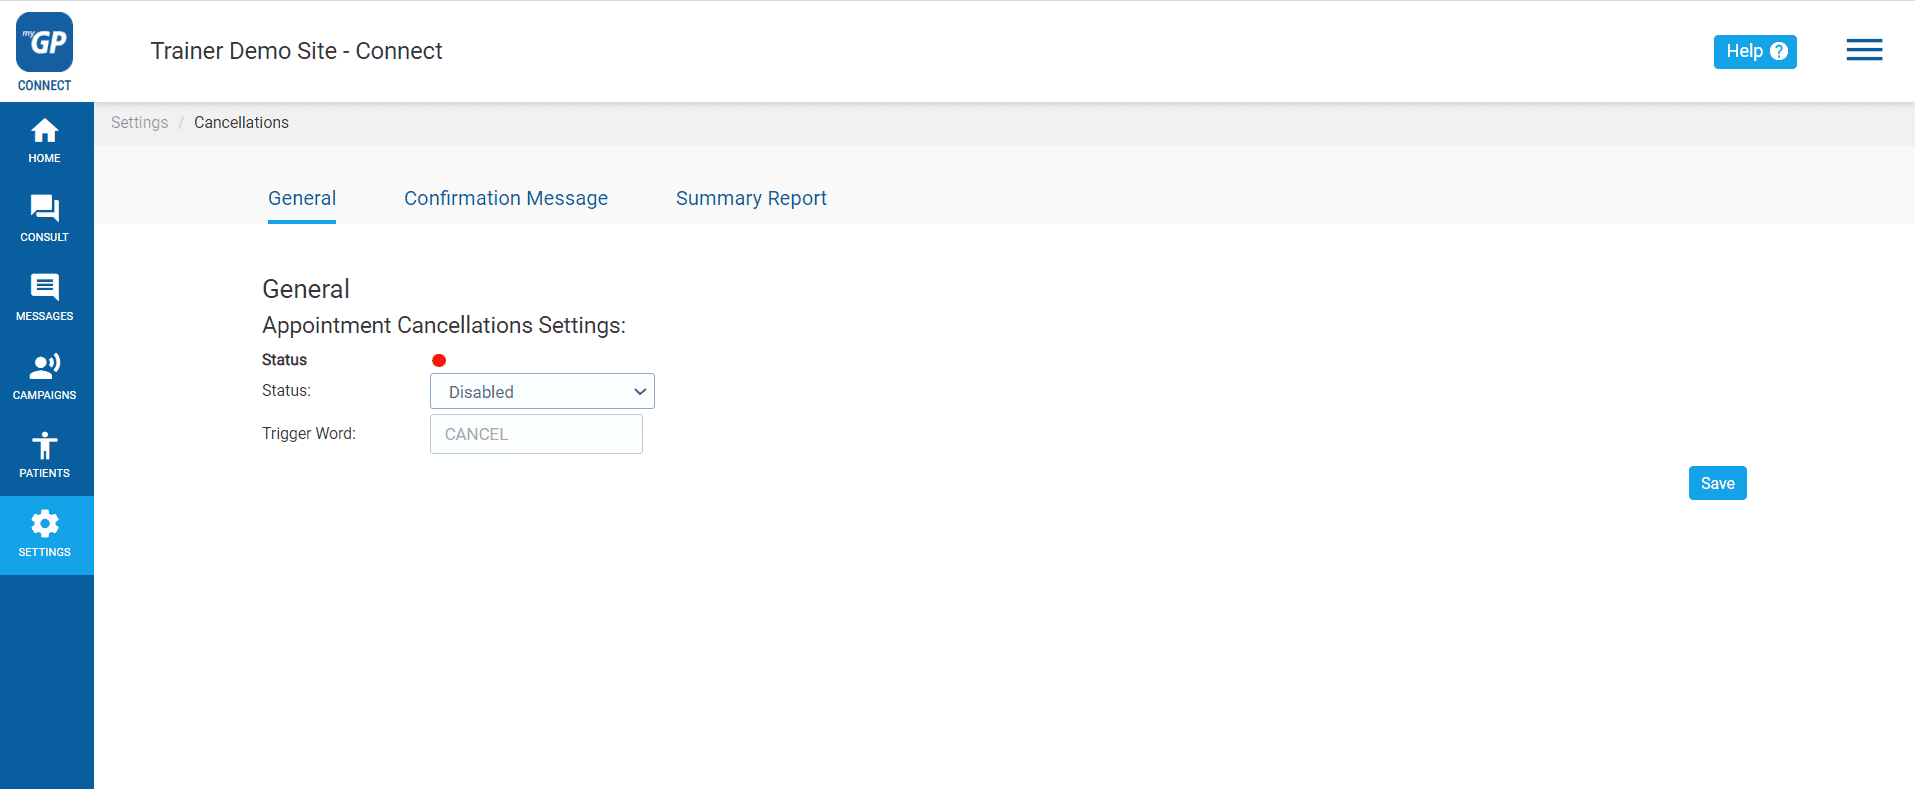
- Refer to the Status drop down menu and click Disabled
- Choose Enabled
- Select Save from the far right
- The Status light will now switch to Green
© 2026 iPLATO. All rights reserved